SNIPPETcaiorss
Mwiki
Math-oriented Wiki engine for scientific and technical communication based on MyST Markdown, GFM (Github-Flavored Markdown), Obsidian Markdown and Media Wiki markup language.
CSSAny theme
# MWiki - Markdown-Powered Wiki
## Overview
MWiki is a **wiki engine** and note taking web application software geared towards mathematics and research designed for scientific and technical communication. This wiki engine software has semantic-rich lightweight markup language based on MyST markdown, Obsidian markdown, and Mediawiki engine markup language. In this application is also a static websiste generator, that can export MWiki notes or pages to a static websites or self-contained html files for offline reading, similar to PDF files.
This Python application is powered by Python Flask web framework and the extensible markdown-it parser used by MyST markdown and the Jupyter Book project.
Applications:
+ Documentation
+ Technical/Scientific Writing, specially STEM (Science, technology, engineering, and mathematics) fields.
+ Personal Knowledge Base
+ Knowledge and Information Preservation
**Changelog:**
+ [./changelog.md](./changelog.md)
**NOTES:**
+ Note: This software is still **work in progress** and under early stage. However, it can already be used as a personal note taking application.
+ Note: Mediawiki is the wiki engine software that powers Wikipedia.
See also:
+ [README in Portuguese](./docs/README-portuguese.md) - Portuguese language version of this document. The original documentation was written in English.
### Features Highlights
#### Wiki Features
+ File-based Wiki: all Wiki pages are stored as Markdown files like Moin Moin wiki engine and Dokuwiki. However, it uses SQLite file database or a any full-featured database for system management purposes.
+ LaTeX equations with serveral enumeration styles, rendered MathJax or KaTeX (faster rendering, but the usage of KaTeX is still experimental).
+ Cross reference hyperlinks to LaTeX equations using `\label{EquationLabel}` and `\eqref{EquationLabel}`. This feature is supported for both MathJax and KaTeX rendering engines.
+ Support for page-specific LaTeX macros and global LaTeX macros for MathJax or KaTeX rendering engines.
+ Full text search which allows complex search queries similar to web search engines.
+ Supports MyST Markdown, GFM (Github-Flavored Markdown Support), subset of Obsidian Markdown syntax, subset of Mediawiki markup language and inline HTML.
+ Pages written in Markdown-based markup language instead of HTML, which allows to any non programmers to write scientific and technical documents that are rendered to html.
+ Buttons for editing specific document sections similar to Media wiki section editing buttons.
+ File upload. Now the wiki code editor has a button for inserting a hyperlink to an uploaded file. When the button is clicked, a popup window for upload is shown. Once the user sends the file, the window is closed and a link to the file is inserted in the editor.
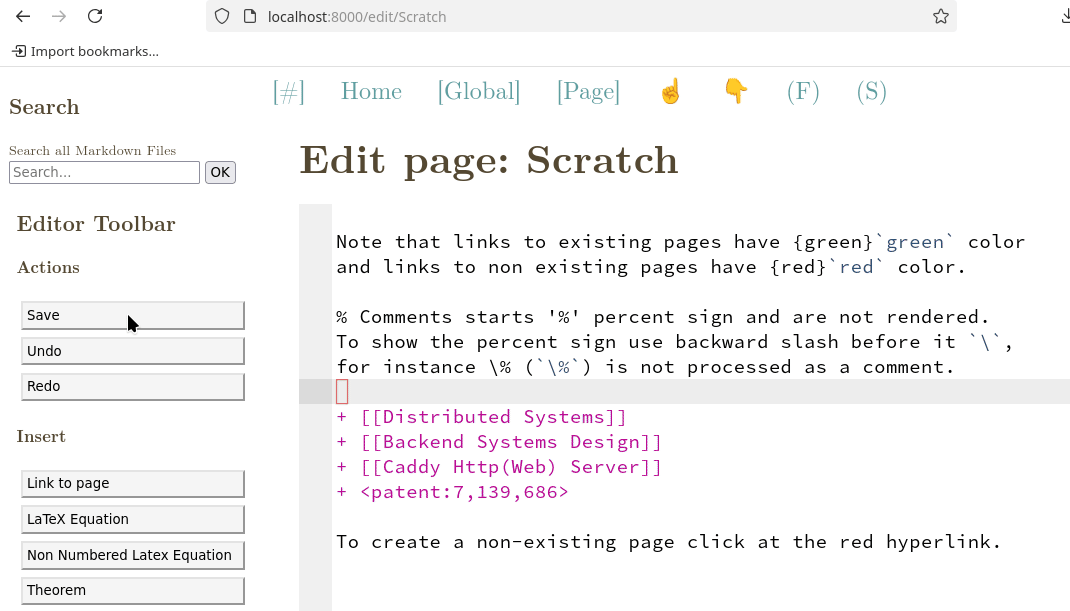
+ Embeddable pages. The contents of a wiki page can be embedded in another wiki page by using the syntax `![[Name of Wiki page to be embedded]]`
+ Document preview - allows users viewing how a wiki page markdown text will look like when rendered before saving it. The editor's preview button also allows viewing how a selected markdown code of a wiki page looks like when rendered.
+ User Interface with support for internationalization (i18N) and localization (i10N). The default language of the user interface can be changed in the form settings. For a while, only English (International English with American spelling) and Portuguese (Brazilian Portuese) languages are available. However, new language or locale can be added without changing the codebase.
+ Vendored third-party JavaScript dependencies for offline usage. For instance, MWiki has MathJax, pseudocode-JS, and Ace9 in the source code for offline usage even when no CDN is available due to lack of internet connectivity or if the Wiki is used in rescrited environment behind a firewall.
#### Access control
+ The wiki has the following types of users: *admin*, that can edit the Wiki pages; *guest* a registered used which can view pages even if the wiki is not public, but a guest user cannot edit any page; and *anonymous* users (non logged in users) that can only view pages if the **public** checkbox in the Wiki settings ('/settings' pages) is enabled.
+ Public/private wiki settings - if the **public** checkbox in MWiki settings page is disabled, only logged in users will be able to view the wiki pages and non logged in users will be redirected to the authentiation screen. If this checkbox is enabled, non logged in users can view the wiki. Note that: only users of type administrator can edit the wiki pages and make changes to any content.
#### Text Editor Features
+ Markdown **Code editor** built on top of Ace9 JavaScript code editor.
+ *Clipboard to markdown converter*, which allows turning html content copied from any other web page (aka web site) to MWiki markdown. This feature is similar to Obsidian's non-plain text copying and pasting.
+ Upload images by pasting them from clipboard.
+ Usage: Copy any image using the right click on any picture and past it on the text editor sesssion of some wiki page either by using the mouse or typing Ctrl + v.
+ NOTE: The clipboard features rely on Clibpboard Html5 API, which only is available on [secure contexts](https://developer.mozilla.org/en-US/docs/Web/Security/Secure_Contexts). Therefore pasting images from clipboard to the wiki text editor only works if the wiki is served on local host or from a domain with https (HTTP + TLS), which may require a reverse proxy such as Caddy or NGinx for TLS/SSL encryption and server authentication.
+ [VIM](<https://en.wikipedia.org/wiki/Vim_(text_editor)>) Editor Keybindings: The Wiki editor uses VIM keybindings by default.
See also:
+ *VIM dot ORG* - Official Website
+ https://www.vim.org
+ *Vim (text editor)*
+ https://en.wikipedia.org/wiki/Vim_(text_editor)
+ *A Great Vim Cheat Sheet*
+ https://vimsheet.com/
+ *Vim Cheat Sheet*
+ https://vim.rtorr.com
+ *Vim Key Bindings – Vim Keys List Reference*
+ https://www.freecodecamp.org/news/vim-key-bindings-reference/
+ *vi Complete Key Binding List*
+ https://hea-www.harvard.edu/~fine/Tech/vi.html
#### Wiki Markup Language
+ Text formatting:
+ Italic Text
+ Bold Text
+ Strikethrough text (also known as deleted text)
+ Colored text
+ Abbreviation, which corresponds to the `<abbr>` html5 tag.
+ Superscript text
+ Subscript text
+ Code blocks with syntax highlight
+ Tables
+ List
+ Bullet List
+ Ordered Lists
+ Definition Lists
+ Scientific and Technical Communication
+ Built-in inline LaTeX formula (powered by MathJaX)
+ Built-in LaTeX formula (display mode) with automatic enumeration
+ Special code blocks for adding custom LaTeX macros
+ Pseudocode code block
+ Admonition (also known callout box) for mathematical definition
+ Admonition for mathematical theorem
+ Admonition for solved exercise examples
+ Foldable section for solution of solved exercise
+ Foldable section for theorem proofs, used in theorem admonition.
+ Admonitions
+ Tip Admonition
+ Note Admonition
+ Information Admonition
+ Warning Admonition
+ Foldable Admonition
View detailed documentation and examples at:
+ [Markup Language](https://caiorss.github.io/mwiki/refcard.html)
## Keyboard Shortcuts (Keybindings)
+ NOTE: It is not necessary to remember those keybindings since there is menu button in the **[Main]** menu, which allows opening the keybind (shortcut) helper window displaying all keybindings.
+ NOTE: Available since release v0.3
| Shortcut | Description |
| --------- | ------------------------------------------------ |
| ? | Toggle keybind (shortcut) helper window. |
| ? | Type ? Question mark again to close this window. |
| Ctrl / | Jump to search form. |
| Ctrl e | Toggle for quick jumpo to Wiki page. |
| Ctrl 1 | Go to Index page '/' URL |
| Ctrl 2 | Go to /pages - list of all Wiki pages. |
| Ctrl 3 | Go to /tags - list of all tags. |
| Ctrl 5 | Toggle headings of current Wiki page. |
| Ctrl 9 | Toggle display all links of current wiki page. |
## Demonstration
A demonstration about how MWiki pages look like can be seen at
+ https://caiorss.github.io/mwiki
which is a static websiste built using MWiki static generator command $ mwiki compile by compiling all markdown files *.md of the repository folder [./sample-wiki](./sample-wiki) to html.
Since this demonstration is a static website, it does not have a login form and other server access control functions. However, it is possible to use all client-side features, including the changing the user interface language.
### GIF Animations
NOTE: Although the GIF animations are outdated due to the major layout and UI - User Interface Changes, the presented features remains the same.
**Usage GIF animation**

**Copying and pasting images**

**Markdown preview feature**
+ The editor button preview allows viewing how a wiki page will look like before saving it. The preview feature also allows viewing how a selected markdown text will look like before saving it.

### Screenshots
**Login Screen**
If the wiki is configured in the settings forms as non public, the user will be redirected to the authentication form. Redirection to this form also happens if the user attempts to access any page requiring authentication. Note that the default site name is MWiki. In this case the site name is set to WNotes. It can be changed in the log in form.

**Wiki Screenshot 1**
This Wiki page, whose relative URL is /wiki/Linear%20Algebra%20New is generated by processing the file 'Linear Algebra New.md'.

**Wiki Screenshot 2**

**Wiki Screenshot 3**

**Wiki Screenshot 4**
MWiki code editor powered by Ace9 Javascript code editor.

LaTeX input window, a popup window that can be in the editor by clicking at the button "LaTeX Input Window". Any LaTeX formula typed in this window, is immediately rendered, providing a fast feedback to users.

Dialog window for inserting emoji and unicode symbols. This dialog provides many emoji and unicode symbols, including math symbols, currencies, APL (array-oriented programming language) symbols, country flags and so on.

**Wiki Screenshot 5 (Settings)**
MWiki settings page.


**Wiki Screenshot 6**
Main menu screenshot.

**Wiki Screenshot 7**
Page menu screenshot.

**Wiki Screenshot 8**
It is possible to fold all Wiki headings for fast navigation on mobile devices or desktop by clicking at the '(F)' button on the top navigation bar.
1. Clique aqui para dobrar/desdrobrar todos cabeçalhos (títulos) e as correspondentes seções.
2. Clique no lapiz para editar apenas a seção do documento correspondente a este cabeçalho.
3. Clique neste cabeçalho/título para dobrar/desdobrar esta seção.

**Wiki Screenshot 9**

**Wiki Screenshot 10**
The Wiki has built-in search engine that allows searching for keywords in all Markdown files used for rendering the wiki pages.

**Wiki Screenshot 11 - Reference Card**
This wiki provides a reference card popup windown that provides examples of the MWiki markup language.
(1) The reference card can be opened by clicking at the button 'Reference Card' in the editor toolbar.

(2) Reference card with all sections folded.

(3) Reference card with a section unfolded.

**Wiki Screenshot 12**
It is possible to view equations referenced by links, defined using `$\eqref{EquationLabel}`, to LaTeX equations labeled with `\label{EquationLabel}` wihout clicking at reference links. This feature makes it easier and faster to browse cross-referenced equations. Note that it is only available for KaTeX rendering engine.

## Installation
### Installation using UV package manager (1)
[UV](https://github.com/astral-sh/uv) is a newer blazing fast package manager for Python, that can even install multiple specific versions of the Python interpreter without disrupting Python installation used by the system. UV can also install Python tools in isolated environment without breaking the current Python installation.
**STEP 1**
Install lastest stable release. NOTE: Now the master branch only contains stable code.
```sh
$ uv tool install git+https://github.com/caiorss/mwiki
... ... ... ... ... ... ... ... ..
Installed 2 executables: mwiki, mwiki-convert
```
Install latest stable release: version v0.9.4.
```sh
$ uv tool install https://github.com/caiorss/mwiki/archive/refs/tags/v0.9.4.zip
```
Or install v0.9.4 using the commit hash.
```sh
$ uv tool install https://github.com/caiorss/mwiki/archive/0064cd2c2d730d4acadb74fc59a3f47100774fe2.zip
```
Install release version v0.9.3.
```sh
$ uv tool install https://github.com/caiorss/mwiki/archive/refs/tags/v0.9.3.zip
# Or
$ uv tool install https://github.com/caiorss/mwiki/archive/7af8d4c77fa0a1c6a48cbcec548d88537b63c039.zip
```
Install Version 0.9.2.
```sh
$ uv tool install https://github.com/caiorss/mwiki/archive/refs/tags/v0.9.2.zip
# Or
$ uv tool install https://github.com/caiorss/mwiki/archive/aba98a39fa761f0270d328445b731a79c3403ff9.zip
```
Install Version 0.9.1
```sh
$ uv tool install https://github.com/caiorss/mwiki/archive/refs/tags/v0.9.1.zip
# Or
$ uv tool install https://github.com/caiorss/mwiki/archive/2c01584aab00ac709b8714a49a2555231ad9a0eb.zip
```
Install Version 0.9
```sh
$ uv tool install https://github.com/caiorss/mwiki/archive/refs/tags/v0.9.zip
# Or
$ uv tool install https://github.com/caiorss/mwiki/archive/a381108846b8044cad5466385de0cae3ee4122e9.zip
```
Install release: version v0.81
```sh
$ uv tool install https://github.com/caiorss/mwiki/archive/refs/tags/v0.8.1.zip
# Or
$ uv tool install https://github.com/caiorss/mwiki/archive/bbd1f292b7bb2d4c9c2e948ed4d907f525388896.zip
```
Install release: version v0.8
```sh
$ uv tool install https://github.com/caiorss/mwiki/archive/refs/tags/v0.8.zip
# Or
$ uv tool install https://github.com/caiorss/mwiki/archive/e2a9fdc11abf0083e06bd5b90ad297c5e8b5d681.zip
```
Install release: version v0.7
```sh
$ uv tool install https://github.com/caiorss/mwiki/archive/refs/tags/v0.7.zip
#or
$ uv tool install https://github.com/caiorss/mwiki/archive/846468ff566248b88a20ae5ab93073d20443e889.zip
```
Install release: version v0.6
```sh
$ uv tool install https://github.com/caiorss/mwiki/archive/refs/tags/v0.6.zip
# or
$ uv tool iinstall https://github.com/caiorss/mwiki/archive/cb5d6855890d218d18d142447c0b562b6ef3afb3.zip
```
Install release: version v0.5.1
```sh
$ uv tool install https://github.com/caiorss/mwiki/archive/refs/tags/v0.5.1.zip
## Or
$ uv tool install https://github.com/caiorss/mwiki/archive/239eeab1a5e52ec7ed8ad941866bb3292052fa09.zip
```
Install release: version v0.5
```sh
$ uv tool install https://github.com/caiorss/mwiki/archive/refs/tags/v0.5.zip
## Or
$ uv tool install https://github.com/caiorss/mwiki/archive/e433a7c903be82919996fdd1f2f114bfb2c43497.zip
```
Install release: version v0.4
```sh
$ uv tool install https://github.com/caiorss/mwiki/archive/refs/tags/v0.4.zip
# Or (reproducible install)
$ uv tool install https://github.com/caiorss/mwiki/archive/a7d898080f8549d82fd8eb2766822cefeb776e1e.zip
```
Install release: version v0.3.1
```sh
$ uv tool install https://github.com/caiorss/mwiki/archive/refs/tags/v0.3.1.zip
# Or (reproducible install)
$ uv tool install https://github.com/caiorss/mwiki/archive/3f4d38a8bc103dee8f89230c6b0a9eefb3083766.zip
```
Install release v0.2
```sh
$ uv tool install https://github.com/caiorss/mwiki/archive/refs/tags/v0.2.zip
## OR - (Reproducible installation since commits cannot be changed)
$ uv tool install https://github.com/caiorss/mwiki/archive/1a3388679af0a6abaec83f6a88415b617e580c83.zip
```
Install release v0.1
```sh
$ uv tool install https://github.com/caiorss/mwiki/archive/refs/tags/v0.1.zip
```
**STEP 2** Run executable mwiki:
```sh
$ mwiki
Usage: mwiki [OPTIONS] COMMAND [ARGS]...
Options:
--help Show this message and exit.
Commands:
compile Compile Latex Formulas of .md file or folder to SVG images.
convert Convert from org-mode markup to markdown
manage Manage MWiki settings, including accounts, passwords and etc.
server Run the mwiki server.
```
**Inspect Executable Files**
```sh
$ which mwiki
/home/username/.local/bin/mwiki
$ whereis mwiki
mwiki: /var/home/username/.local/bin/mwiki
$ file $(which mwiki)
/home/username/.local/bin/mwiki: symbolic link to /home/username/.local/share/uv/tools/mwiki/bin/mwiki
$ file $(readlink $(which mwiki))
/home/username/.local/share/uv/tools/mwiki/bin/mwiki: Python script, ASCII text executable
```
**Uninstall**
### Installation using UV package manager (2)
This installation procedure uses the UV package manager for installing from the source code instead of github URL.
**STEP 1:** Clone the repository.
```sh
$ git clone https://github.com/caiorss/mwiki
```
Enter the source code directory.
```sh
$ cd mwiki
```
**STEP 2:** Install MWIKI using UV.
```sh
$ uv tool install .
Resolved 36 packages in 1.07s
Installed 36 packages in 119ms
+ blinker==1.9.0
+ cachelib==0.13.0
+ cffi==1.17.1
+ click==8.1.8
+ cryptography==45.0.4
+ flask==3.1.1
+ flask-session==0.8.0
+ flask-sqlalchemy==3.1.1
+ flask-wtf==1.2.2
+ frontmatter==3.0.8
+ greenlet==3.2.3
+ importlib-metadata==8.7.0
+ itsdangerous==2.2.0
+ jinja2==3.1.6
+ linkify-it-py==2.0.3
+ markdown-it-py==3.0.0
+ markupsafe==3.0.2
+ mdit-py-plugins==0.4.2
+ mdurl==0.1.2
+ msgspec==0.19.0
+ mwiki==0.1
+ pillow==11.2.1
+ pycparser==2.22
+ pygments==2.19.2
+ python-dateutil==2.9.0.post0
+ pyyaml==5.1
+ six==1.17.0
+ sqlalchemy==2.0.41
+ tomli==2.2.1
+ typing-extensions==4.14.0
+ uc-micro-py==1.0.3
+ waitress==3.0.2
+ watchdog==6.0.0
+ werkzeug==3.1.3
+ wtforms==3.2.1
+ zipp==3.23.0
Installed 2 executables: mwiki, mwiki-convert
```
**Uninstall**
```sh
$ uv tool uninstall mwiki
Uninstalled 2 executables: mwiki, mwiki-convert
```
### Installation using Pipx pacakge manager
**STEP 1:** Pip and Python are assumed to be already installed.
Install [pipx](https://github.com/pypa/pipx) tool.
```sh
$ pip install pipx
```
**STEP 2:** Install using Pipx
Install Mwiki using Pipx (MWiki requires Python >= 3.9)
```sh
$ pipx install git+https://github.com/caiorss/mwiki
installed package mwiki 0.1, installed using Python 3.9.19
These apps are now globally available
- mwiki
- mwiki-convert
- mwiki_convert
done! ✨ 🌟 ✨
```
Install Mwiki using Pipx and a different version of Python. This command is useful if the default version of Python in the current system is 3.8 or a non supported version.
```
$ pipx install --python=3.9 git+https://github.com/caiorss/mwiki
```
### Installation using Docker
Docker is the most realibable way to install Python application since it is reproducible and helps to avoid the Python and Pip dependency hell (also knowns as "works-on-machine problem").
**STEP 1:** Clone the repository
```sh
$ git clone https://github.com/caiorss/mwiki mwiki
# Enter source code directory
$ cd mwiki
```
**STEP 2:** Build the docker image.
```sh
$ docker build --tag mwiki-server .
```
or run the Makefile (only supported on Unix-like systems with GNU Make)
```sh
$ make docker
```
**STEP 3:** Run MWiki docker image. The $WIKIPATH environment variable is set to any directory containing markdown files, including Obsidian vaults.
Create a .env file in the current directory containing the initial configuration of MWiki passed as environment variables. (Optional)
File: .env
```
MWIKI_ADMIN_PASSWORD=u2afb5ck69
MWIKI_SITENAME=WBook
WIKI_PUBLIC=
```
Run docker passing the .env configuration file.
```sh
$ docker run --rm -it --privileged \
--network=host --env-file=$PWD/.env \
--volume="$WIKIPATH:/wiki" mwiki-server
[TRACE] Admin user created OK
[INFO] Enter the username: admin and password: 'SN81N87JZ6' to log in.
[2025-01-09 20:00:40 +0000] [1] [INFO] Starting gunicorn 23.0.0
[2025-01-09 20:00:40 +0000] [1] [INFO] Listening at: http://0.0.0.0:9090 (1)
[2025-01-09 20:00:40 +0000] [1] [INFO] Using worker: sync
[2025-01-09 20:00:40 +0000] [7] [INFO] Booting worker with pid: 7
[2025-01-09 20:00:40 +0000] [8] [INFO] Booting worker with pid: 8
[2025-01-09 20:00:40 +0000] [9] [INFO] Booting worker with pid: 9
[2025-01-09 20:00:40 +0000] [10] [INFO] Booting worker with pid: 10
[2025-01-09 20:00:40 +0000] [11] [INFO] Booting worker with pid: 11
[2025-01-09 20:00:40 +0000] [12] [INFO] Booting worker with pid: 12
[2025-01-09 20:00:40 +0000] [13] [INFO] Booting worker with pid: 13
[2025-01-09 20:00:40 +0000] [14] [INFO] Booting worker with pid: 14
[2025-01-09 20:00:40 +0000] [15] [INFO] Booting worker with pid: 15
[TRACE] _username = admin ; _password = SN81N87JZ6
[WARNING] Note implemented html rendering for foot_note_block = SyntaxTreeNode(footnote_ref)
[WARNING] Note implemented html rendering for foot_note_block = SyntaxTreeNode(footnote_block)
```
Run as a daemon (background service detached from terminal):
```sh
$ docker run --detach \
--name=mwiki \
--network=host \
--env-file=$PWD/.env \
--privileged \
--volume="$PWD/pages:/wiki" mwiki-server
a6f0838f5159ff75aa25228fafdbd2f4fe1432c3359a9dc5d3ec84b10d801577
```
View logs from mwiki container:
```sh
$ docker logs -f mwiki
[2025-01-09 20:06:23 +0000] [1] [INFO] Starting gunicorn 23.0.0
[2025-01-09 20:06:23 +0000] [1] [INFO] Listening at: http://0.0.0.0:9090 (1)
[2025-01-09 20:06:23 +0000] [1] [INFO] Using worker: sync
[2025-01-09 20:06:23 +0000] [7] [INFO] Booting worker with pid: 7
[2025-01-09 20:06:23 +0000] [8] [INFO] Booting worker with pid: 8
[2025-01-09 20:06:23 +0000] [9] [INFO] Booting worker with pid: 9
[2025-01-09 20:06:23 +0000] [10] [INFO] Booting worker with pid: 10
[2025-01-09 20:06:23 +0000] [11] [INFO] Booting worker with pid: 11
[2025-01-09 20:06:23 +0000] [12] [INFO] Booting worker with pid: 12
[2025-01-09 20:06:23 +0000] [13] [INFO] Booting worker with pid: 13
[2025-01-09 20:06:23 +0000] [14] [INFO] Booting worker with pid: 14
[2025-01-09 20:06:24 +0000] [15] [INFO] Booting worker with pid: 15
```
Stop MWiki container:
```
$ docker stop mwiki
mwiki
```
Start MWiki container
```sh
$ docker start mwiki
```
Restart MWiki container software.
```sh
$ docker restart mwiki
```
Change site name using the built-in CLI (Command Line Interface)
```sh
$ docker exec -it mwiki python -m mwiki manage --sitename=WNotes
[*] Site name changed to: WNotes
```
Change admin password.
```sh
$ docker exec -it mwiki python -m mwiki manage --admin-password=somePassNewPassword
```
**STEP 5:**
Open MWiki in the web browser, in the port 8080 by copying and pasting the URL http://localhost:8000 and enter 'admin' in the username entry and the initial admin password in the password field. The initial admin password is provided in the previous command output. In this password is '0JAJ6UAMUA', which is a random generated string unique per MWiki installation.
**STEP 6:**
Open the settings page http://localhost:8000/admin and change the Wiki settings. Then go the URL http://localhost:8000/user and change the admin password. Note that user passwords are never stored in plaintext, they are always stored in hashed form for security reasons.
### Installation via Docker-Compose or Podman-Compose
**STEP 1:** Clone the repository
```sh
$ git clone https://github.com/caiorss/mwiki mwiki
# Enter source code directory
$ cd mwiki
```
If the repository is already cloned, it is possible to get the latest changes by running
```
$ git pull
```
**STEP 2:** Switch to a stable release
```sh
$ git checkout <<RELASE-VERSION>>
# For instance
$ git checkout v0.31
```
**STEP 3:** Edit the config.env file.
File: config.env
```sh
# MWiki configuration files
#----------------------------------#
MWIKI_SERVER_ADDR=mwiki
MWIKI_SERVER_PORT=9090
# Url used by MWiki for temporary 20 seconds passwordless login URL
# with the command $ mwiki auth. This field is optional
### MWIKI_URL=http://subdomain.websitedomain.com
# Path to wiki folder, where *.md markdown files, images and other
# files will be stored.
MWIKI_PATH=./sample-wiki
# Password of main admin
MWIKI_ADMIN_PASSWORD=mypasswd
# Name of the Wiki (Name of the website)
MWIKI_SITENAME=MyNoteBook
# URL which the website is hosted or just domain name
MWIKI_WEBSITE=localhost sbox.ts
# Configure MWiki as a private Wiki.
# => Only logged in users can view wiki pages.
# MWIKI_PUBLIC=
# Configure MWiki as a public Wiki.
# => Anonymous users can view wiki pages, however only
# admin users can edit.
MWIKI_PUBLIC=true
# Server static files using Caddy or NGinx
MWIKI_X_ACCEL_REDIRECT=true
#----------------------------------------------------##
## Less common Settings for certificate ##
#----------------------------------------------------##
# They are not needed if the server is hosted in a machine
# with static and public IP address. Those settings are only
# required when hosting in internal networks (LANs).
#
MWIKI_INTERNAL_CA=
MWIKI_ACME_CA_URL=
```
**STEP 4:** Run docker-compose or podman compose for the deployment.
Deploy with docker-compose.
```sh
$ docker-compose --env-file=./config.env up -d
```
Deploy with podman-compose.
```sh
$ podman-compose --env-file=./config.env up -d
```
**STEP 5:** TLS/SSL Certificates
If the MWiki is hosted in a machine with static and public IP address reacheable from anywhere on the internet and MWiki domain points to this IP address, Caddy will automatically obtain the TLS/SSL certificate from Let's Encrypt CA - Certificate authority.
If this application is hosted on local network or site-to-site VPN, such as tailscale and using Let's Encrypt CA is not possible, Caddy can be turned into a local CA - Certificate Authority by editing the config.env and changing
```
MWIKI_INTERNAL_CA=true
```
This step creates an endpoint
+ `https://<mwiki-website-domain>/root.crt`
where the user can download the root CA certificate and install it on web browsers or phones. This root CA cerfiticate can be downloaded using curl. This procedure is useful for self-hosting MWiki on home labs.
```sh
$ curl -O -k --silent https://<mwiki-website-domain>/root.crt
```
See also:
+ *Set up Certificate Authorities (CAs) in Firefox*
+ https://support.mozilla.org/en-US/kb/setting-certificate-authorities-firefox
+ *Installing a Root Certificate Authority in Firefox*
+ https://chewett.co.uk/blog/854/installing-root-certificate-authority-firefox/
+ *How to Add a Certificate on Android? Step by Step*
+ https://www.airdroid.com/mdm/add-certificate-android/
## Post-Installation
### Access MWiki in the local network
WARNING: This procedure is not safe on untrusted local networks, such as public Wifis, without SSL/TLS encryption or SSH encryption if port forwarding is used, as anyone in the local network using a network sniffer, including W1r3sh4rk, may intercept any non encrypted network traffic.
**STEP 1:**
Get the hostname of the computer where mDNS is installed on Linux, MacOSX or Windows by running the following command in a terminal emulator. In Microsft Windows, a terminal emulator can be opened by typing Windows-Key + R and entering 'cmd'.
```sh
$ hostname
```
and also get the computer IP address on Microsoft Windows for debugging purposes.
```sh
$ ipconfig
```
on Linux the IP address of the server in the local network can be obtained by running.
```sh
# Older versions of Linux distributions, BSD and MacOSX
$ ifconfig
## Newer version of Linux distributions
$ ip addr
```
**STEP 2:**
If the MWiki server is installed and running and it is possible to access the server from any computer in the local network with mDSN - Multicast DNS enabled by opening the one the of the following URLs in any web browser from any device or computer in the local network, including smart phones or tablets.
+ http://dummy.local:8080 if MWiki is listening to TCP port 8080
+ http://dummy.local if MWiki is listening to port 80 (default HTTP TCP port)
+ http://192.168.0.106:8080 if the server IP address obtained in the step 1 is 192.168.0.106 and MWiki is listening to port 8080
+ http://192.168.0.106 if the server IP address obtained in the step 1 is 192.168.0.106 and MWiki is listening to port 80.
Observations:
1. Note that *dummy* is the hostname (network name) of the computer running MWiki obtained in the step 1 with the command `$ hostname`.
2. In most corporate network, the multicast network traffic is disabled by default, while in most home networks the multicast network traffic, including multicast DNS is enabled by default.
MWiki can be started with the command
```
$ mwiki server --wsgi --port=9010 --wikipath=/home/user/path/to/wiki/repository
```
It is recommend to run the application using Caddy or NGinx reverse proxy servers as they provide TLS encryption and better performance for serving static files and handling higher network traffic.
### Open Firewall Ports
**STEP 3:**
In order to be able to access MWiki or any other web server from other computers or devices, it may be necessary to open TCP ports in the operating system firewall.
Open port 8080 in Microsoft Windows (requires opening a terminal with administrator privilegees).
```sh
$ netsh firewall add portopening TCP 8080 "MWIki server port"
```
Open port 8080 in Linux with Iptables (Default Linux firewall, all other Linux firewalls are wrappers around Iptables).
```sh
$ sudo iptables -A INPUT -p tcp --dport 8080 -j ACCEPT
```
Open port 8080 in Linux with UFW (Uncomplicated Firewall), mostly used by Debian and Ubuntu derived Linux distributions.
```sh
$ sudo ufw allow 8080/tcp
```
Open port 8080 in Linux with firewalld.
```sh
$ sudo firewall-cmd --add-port=8080/tcp --permanent
$ sudo firewall-cmd --reload
```
### SSH Port Forwarding
The feature for pasting images from clipboard requires a browser's secure context, which can be obtained by running the MWiki server using a TLS (Transport Layer Security) reverse proxy such as Caddy or running it on localhost. An alternative way to obtain a secure context without dealing with NGinx or Caddy installation is using SSH local port fowarding for redirecting the network traffic of local TCP port to TCP port of a remote machine, any computer with an ssh server installed. For instance, if MWiki is running a remote machine whose hostname is dummy.local (Local network IPv4 address 192.168.0.115) listening the TCP port 9090, it is possible to redirect the network traffic from local port 8080 to the port 9090 of the dummy machine with the ssh command
```sh
$ ssh -o StrictHostKeyChecking=no -v -f -N -L 8080:127.0.0.1:9090 myuser@dummy.local
```
or
```sh
$ ssh -o StrictHostKeyChecking=no -v -f -N -L 8080:127.0.0.1:9090 myuser@dummy.local -p 2022
```
Where:
+ `-v`
- It means verbose for better error diagnosing.
+ `-f` means running ssh in background without blocking the current terminal emulator.
+ `-N`
- It means non-interactive session for port forwarding only.
+ `-L 8080:127.0.0.1:9090`
- Local port forwarding of TCP port 8080 of current machine to port 9090 of the remote machine.
+ `o StrictHostKeyChecking=no`
- The purpose of this command line option is to ignore strict host checking (optional).
+ `-p 2022`
- Use ssh port 2022 instad of default ssh port 222.
After running this command, it will be possible to access the MWiki server by opening the any of the following URLs in any web browser, inclding Firefox, Safari, Microsoft Edge and etc.
+ http://localhost:8080
or
+ http://127.0.0.1:8080
The advantage of this approach is allowing access to the Wiki server even if it is not exposed to the internet and all TCP ports are blocked by any firewall application. This procedure is also helpful for providing [secure context](https://developer.mozilla.org/en-US/docs/Web/Security/Secure_Contexts), which allows using the [clipboard](https://developer.mozilla.org/en-US/docs/Web/API/Clipboard_API) APIs (Application Programming Interfaces) of web browsers without dealing with TLS (Transport Layer Security), former SSL (Secure Socket Layer), certificates. Note that the network traffic between the remote machine and local machine is encrypted by SSH. It is also worth mentioning that a built-in SSH client is available in Microsoft Windows 10 and Microsft Windows 11.
Note that the SSH hostname myuser@dummy.local could also be:
1. Domain name for instance, my-dummy-machine.net, if this hypothetical domain points the dummy machine public Ipv4 address.
2. mDNS (Multi-cast DNS) domain name. Example: dummy.local if the machine hostname is dummy and the local network allows multi-cast DNS. Most home networks allow multicast DNS, however it is disabled in most corporate networks.
3. Tailscale (Site-To-Site) VPN magic DNS domain name.
4. External Ipv4 address, for instance 172.168.115.125 if the MWiki is running in any machine with public (fixed/static) IPv4 adress, often cloud VPS - Virtual Private Server virtual machine. All VPS (Virtual Private Server), cloud virtual machines, provided by Google Cloud, AWS, Digital Ocean and other cloud providers have public IPv4 address reacheable from anywhere around the world.
5. Internal Ipv4 for accessing in the local network, for instance 192.168.0.115
### Further Reading about SSH, mDNS and Firewall Settings
**Firewalll Settings**
+ *Open TCP Port 80 in Windows Firewall Using Netsh*
+ https://www.wiki.mcneel.com/zoo/homenetsh
+ *Linux Open Port 80 (HTTP Web Server Port)*, Vivek Gite (2022), Cyberciti
+ https://www.cyberciti.biz/faq/linux-iptables-firewall-open-port-80/
+ *5 ways to open a port in Linux explained with examples*, Arun Kumar (2023), FOSS Linux
+ https://www.fosslinux.com/111811/5-ways-to-open-a-port-in-linux-explained-with-examples.htm
+ *Linux .local domain*
+ https://en.wikipedia.org/wiki/.local
+ *Linux Open Port: Step-by-Step Guide to Managing Firewall Ports*, Vijaykrishna Ram and Anish Singh Walia, Digital Ocean
+ https://www.digitalocean.com/community/tutorials/opening-a-port-on-linux
**mDNS - Multicast DNS and Network Discovery - Zeroconf/Bonjour**
+ *Using mDNS aliases within your home network*, Andrew Dupont (2022)
+ https://andrewdupont.net/2022/01/27/using-mdns-aliases-within-your-home-network/
+ *How to set up mDNS on an ESP32*
+ https://lastminuteengineers.com/esp32-mdns-tutorial/
+ *mDNS, hostname.local, and WSL2*, Nelsons' log
+ https://nelsonslog.wordpress.com/2022/01/06/mdns-hostname-local-and-wsl2/
+ *Multicast DNS (MDNS) on Home Networks*
+ https://stevessmarthomeguide.com/multicast-dns/
+ *Pros and Cons of Using Multicast DNS*, Networking Interview
+ https://networkinterview.com/pros-and-cons-of-using-multicast-dns/
+ *Android silently picks up long-awaited mDNS feature*, Anroid Policy
+ https://www.androidpolice.com/android-mdns-local-hostname/
+ *Use network service discovery*, Android Developers
+ https://developer.android.com/develop/connectivity/wifi/use-nsd
+ *Multicast Application Protocol mDNS for Local Discovery*, Expressif (ESP32) Docs
+ https://espressif.github.io/esp32-c3-book-en/chapter_8/8.2/8.2.4.html#multicast-application-protocol-mdns-for-local-discovery
+ *Avahi (software)*, Wikipedia
+ https://en.wikipedia.org/wiki/Avahi_%28software%29
+ Brief: *Avahi is a free zero-configuration networking (zeroconf) implementation, including a system for multicast DNS and DNS Service Discovery. It is licensed under the GNU Lesser General Public License (LGPL). Avahi is a system that enables programs to publish and discover services and hosts running on a local network. For example, a user can plug a computer into a network and have Avahi automatically advertise the network services running on its machine, facilitating user access to those services.* (Wikipedia)
+ *Avahi*, ArchLinux Wiki
+ https://wiki.archlinux.org/title/Avahi
+ Brief: *Avahi is a free Zero-configuration networking (zeroconf) implementation, including a system for multicast DNS/DNS-SD service discovery. It allows programs to publish and discover services and hosts running on a local network with no specific configuration. For example you can plug into a network and instantly find printers to print to, files to look at and people to talk to. It is licensed under the GNU Lesser General Public License (LGPL).* (ArchLinux Wiki)
+ *How to Properly Disable Avahi-Daemon*, Ashish Khadka (2024), Baeldung
+ https://www.baeldung.com/linux/avahi-daemon-disable
+ *Network service discovery with an Avahi container*, Radu Zaharia (2022)
+ https://blog.raduzaharia.com/network-service-discovery-with-an-avahi-container-3dfdce4f1c75
+ *Avahi - Daemon - WebOS Internals*
+ https://www.webos-internals.org/wiki/Avahi
+ *Unveiling Linux Avahi: A Comprehensive Guide*, LinuxVox (2025)
+ https://linuxvox.com/blog/linux-avahi/
**SSH - Secure Shell Server**
+ *Tutorial: SSH in Windows Terminal*, Microsoft MSFT
+ https://learn.microsoft.com/en-us/windows/terminal/tutorials/ssh
+ *Get started with OpenSSH for Windows*, Microsoft MSFT
+ https://learn.microsoft.com/en-us/windows-server/administration/openssh/openssh_install_firstuse?tabs=gui&pivots=windows-server-2025
+ *How to Enable and Use Windows 10's New Built-in SSH Commands*, Chris Hoffman (2017), How-To-Geek
+ https://www.howtogeek.com/336775/how-to-enable-and-use-windows-10s-built-in-ssh-commands/
+ *How to Enable SSH in Windows 10: A Step-by-Step Guide for Beginners*, Matt Jacobs (2024), SupportYourTech
+ https://www.supportyourtech.com/articles/how-to-enable-ssh-in-windows-10-a-step-by-step-guide-for-beginners/
+ *How to Set up SSH Tunneling (Port Forwarding)*, Linuxise (2020)
+ https://linuxize.com/post/how-to-setup-ssh-tunneling/
+ *SSH Port Forwarding (SSH Tunneling) Explained*, Vladmir Kaplarevic (2024)
+ https://phoenixnap.com/kb/ssh-port-forwarding
+ *A Visual Guide to SSH Tunnels: Local and Remote Port Forwarding*, Ixmiuz (2022)
+ https://iximiuz.com/en/posts/ssh-tunnels/
+ *Tunneling and Port Forwarding*, SSH Handbook
+ https://www.sshhandbook.com/overview-of-ssh-tunneling/
## Passwordless Login
MWiki provides the command $ mwiki auth for passwordless login using an authentication token or magic login link.
```sh
$ uv run mwiki auth --help
Usage: mwiki auth [OPTIONS]
Create token and url for authentication without password. The URL is valid
for 20 seconds.
Options:
--wikipath TEXT Path to wiki directory, default '.' current directory.
--user TEXT Username to authenticate.
--help Show this message and exit.
```
Usage example: generate a 20 seconds authentication token and magic login URL for user admin.
````sh
$ mwiki auth --wikipath=./sample-wiki
Copy and paste the following URL in the web browser to authenticate.
http://localhost:8000/auth?token=eyJ1c2VyIjogImFkbWluIiwgInNhbHQiOiAzNTAsICJleHBpcmF0aW9uIjogMTc2MDYzMzczMSwgInNpZ25hdHVyZSI6ICJjMWM3OTc0MjQyMjU0MzhmODlmZjM4MjFkMGJiNWJiOWFiZDI1Zjk4NTQ5MmEwZDAwYzM4N2QzYzllNGE4N2E3In0%3D
Or paste the following token in the log in form http://localhost:8000
eyJ1c2VyIjogImFkbWluIiwgInNhbHQiOiAzNTAsICJleHBpcmF0aW9uIjogMTc2MDYzMzczMSwgInNpZ25hdHVyZSI6ICJjMWM3OTc0MjQyMjU0MzhmODlmZjM4MjFkMGJiNWJiOWFiZDI1Zjk4NTQ5MmEwZDAwYzM4N2QzYzllNGE4N2E3In0=
NOTE: This URL is only valid for 20 seconds.
NOTE: If MWiki URL is not correct, set the environment variable $MWIKI_URL to the app URL.For instance, in bash Unix shell $ export MWIKI_URL=https://mydomain.com before running this comamnd again.
````
The token is the following JSON data encoded as base64 string (text).
```json
{ "user": "admin"
, "salt": 350
, "expiration": 1760633731
, "signature": "c1c797424225438f89ff3821d0bb5bb9abd25f985492a0d00c387d3c9e4a87a7"}
```
The expiration time is the timestamp of the current UTC (Universal Coordinate Time, akin to GMT) + 20 seconds. The salt is a random intger. The signature is a HMAC digital signature of the username, expiration timestamp and salt computed using the app secret key stored in the file $WIKI_REPOSITORY/.data/appkey.txt. The app key is unique per deployment. The porpuse of the HMAC signature is to ensure data integrity and avoid tampering by non authorized users. In addition, the salt and expiration avoid replay attacks.
The command $ mwiki server has the command line switch --auth for generating the login magic link and token.
```sh
$ mwiki server --wsgi --port=9010 --wikipath=./sample-wiki --auth
Copy and paste the following URL in the web browser to authenticate.
http://localhost:9010/auth?token=eyJ1c2VyIjogImFkbWluIiwgInNhbHQiOiA3OTYsICJleHBpcmF0aW9uIjogMTc2MDYzNDI3MiwgInNpZ25hdHVyZSI6ICJmMjA4M2QyOGQ0M2E2YjFhNmRkYzRlNzM1YjJlODdlMTExYzQzMTcwNTIzZDJiYzI2ZDRhYmFmZTI4ZWU2MGQ1In0%3D
Or paste the following token in the log in form http://localhost:9010
eyJ1c2VyIjogImFkbWluIiwgInNhbHQiOiA3OTYsICJleHBpcmF0aW9uIjogMTc2MDYzNDI3MiwgInNpZ25hdHVyZSI6ICJmMjA4M2QyOGQ0M2E2YjFhNmRkYzRlNzM1YjJlODdlMTExYzQzMTcwNTIzZDJiYzI2ZDRhYmFmZTI4ZWU2MGQ1In0=
NOTE: This URL is only valid for 20 seconds.
NOTE: If MWiki URL is not correct, set the environment variable $MWIKI_URL to the app URL.For instance, in bash Unix shell $ export MWIKI_URL=https://mydomain.com before running this comamnd again.
[INFO] Updating Search Index
[INFO] Search index updated OK.
INFO:waitress:Serving on http://0.0.0.0:9010
```
## Static Website Generator
The subcommand $ mwiki export is able to generate a static website by compiling the wiki repository, a folder containing MWiki markdown files to html. Static websistes are easy to deploy with static file servers, such as NGinx or Caddy. Many git forge services, including gitlab or github, also allow deploying stastic websites using an orphan git branch. NOTE: CDN means Content Delivery Network.
### Command Line Help
```sh
mwiki export --help
Usage: mwiki export [OPTIONS]
Export a MWiki repository or a markdown files repository to a static
website.
Options:
--wikipath TEXT Path to folder containing *.md files.
-o, --output TEXT Directory that will contain the compilation
output (default value ./out).
--page TEXT Export single page to html, instead of the
whole wiki.
--website-name TEXT Name of the static website (default value
'MWiki').
--root-url TEXT Root URL that the static website will be
deployed to. (default value '/').
--locale TEXT Default locale of the user interface. (Default
value 'en-US')
--icon TEXT Favicon of the static website. (Default value
MWiki icon)
--main-font TEXT Main font used in document text.
--code-font TEXT Code monospace font used in code blocks.
--title-font TEXT Title font used in document section headings.
--unicode-emoji-favicon TEXT Use unicode or emoji symbol as favicon.
--list-fonts List all available fonts.
--allow-language-switch Allow end-user to switch the user interface
language.
--content-language TEXT Set ISO language code of default content
language.
--self-contained Embed all attachment within the current wiki
page. JavaScripts and CSS are inlined and
images are embedded in base64 encoding. The
generated HTML self-contained file is similar
to a PDF file. This flag is useful for
generating self-contained documents for
offline view.
--embed-latex-renderer Self host MathJax or KaTeX The LaTex rendering
library is copied to the output directory.
--latex-renderer TEXT LaTeX renderer: 'mathjax' or 'katex'. Default:
mathjax
--compile-latex Render all LaTeX formulas on server-side as
HTML by compiling them using KaTeX Note that
this setting requires a NPM installation.and
NPM interpreter available in the $PATH
environment variable.
--verbose Display more information about the compilation
output.
--author TEXT Override the frontmatter attribute author in
all wiki pages. The author field is compiled
to <meta name="author" content="AUTHOR NAME">
This setting only makes sense if there is a
single author.
--source Add menu item for displaying markdown source
code of the current page.
--help Show this message and exit.
```
List all available fonts:
```sh
$ mwiki export --list-fonts
KEY FONT FAMILY
computer-modern Computer Modern
ibm-plex-mono IBM Plex Mono
chicago Chicago MacOS
neo-euler Neo Euler
news-reader NewsReader
literata Literata
literata-variable Literata-Regular
commint-mono Commit Mono
logic-monospace-regular Logic Monospace Regular
go-mono Go Mono
logic-monospace-medium Logic Monospace Medium
libertinus-mono Libertinus Mono
julia-mono Julia Mono
... ... ... ... ... ... ... ... ... ... ... ... ... ... ...
... ... ... ... ... ... ... ... ... ... ... ... ... ... ...
graphik-regular Graphik Regular
space-grotesk Space Grotesk
averia Averia
averia-sans AveriaSans
averia-gruesa Averia Gruesa
notosans NotoSans
textura-modern Textura Modern
```
Compile the folder ./sample-wiki to a static web site at ./out path.
```sh
$ mwiki export \
--wikipath=./sample-wiki \
--website-name=MBook \
--main-font=cmu-concrete \
--title-font=chicago \
--code-font=libertinus-mono \
--allow-language-switch \
--author="John Doe" \
--output=./out
Root URL
- /
Compiling wiki repository
- /var/home/caesar/Documents/projects/mwiki/sample-wiki
Generating static website at
- /var/home/caesar/Documents/projects/mwiki/out
Export Settings
[*] Author: John Doe
[*] Website Name: MBook
[*] Root URL: /
[*] Default User Interface (UI) Locale: en-US
[*] Allow language switch: on
[*] Self Contained Document: off
[*] Compile LaTeX to HTML (KaTeX): off
[*] LaTeX renderer: Mathjax
[*] Load LaTeX renderer from CDN: on
[*] Embed LaTeX Renderer: off
[*] Main font family: CMU Concrete
[*] Title Font Family: Chicago MacOS
[*] Code Font Family: Libertinus Mono
Status:
[*] Compiling sample-wiki/README.md to out/README.html
[*] Compiling sample-wiki/Linux SysRq Key and OOM System Recovery.md to out/Linux_SysRq_Key_and_OOM_System_Recovery.html
[*] Compiling sample-wiki/Open Source Licenses.md to out/Open_Source_Licenses.html
[*] Compiling sample-wiki/about.md to out/about.html
[*] Compiling sample-wiki/Math - Calculus Reference Card.md to out/Math_-_Calculus_Reference_Card.html
[*] Compiling sample-wiki/Internationalization i18n and Localization i10n concepts.md to out/Internationalization_i18n_and_Localization_i10n_concepts.html
[*] Compiling sample-wiki/Index.md to out/index.html
[*] Compiling sample-wiki/LaTeX Reference Card.md to out/LaTeX_Reference_Card.html
[*] Compiling sample-wiki/refcard.md to out/refcard.html
[*] Compilation terminated successfully ok.
```
Inspect the generated static website.
```sh
out
├── about.html
├── images
│ └── logo-java-coffee-cup.png
├── index.html
├── Internationalization_i18n_and_Localization_i10n_concepts.html
├── LaTeX_Reference_Card.html
├── Linux_SysRq_Key_and_OOM_System_Recovery.html
├── Math_-_Calculus_Reference_Card.html
├── Open_Source_Licenses.html
├── pasted
│ ├── pasted-image-1743470376610.png
│ ├── pasted-image-1760610949514.jpg
│ ├── pasted-image-1760611027216.jpg
│ ├── pasted-image-1760611139235.jpg
│ └── pasted-image-1760618396013.jpg
├── Quadratic.html
├── README.html
├── refcard.html
└── static
├── dots-vertical.svg
├── example_java_duke_mascot.svg
├── folder-settings-outline.svg
├── fonts
│ ├── ChicagoFLF.ttf
│ ├── cmu-concrete-italic.woff
│ ├── cmu-concrete-regular.woff
│ └── LibertinusMono-Regular.woff2
├── hamburger-menu.svg
├── icon-home.svg
├── icon-info.svg
├── icon-lightbulb.svg
├── icon-page.svg
├── icon-save-all.svg
├── icon-warning1.svg
├── main.js
├── pencil.svg
└── static_style.css
```
Server the static website using python3 built-in web server.
```sh
$ python3 -m http.server --bind=0.0.0 8080 -d ./out
Serving HTTP on 0.0.0.0 port 8080 (http://0.0.0.0:8080/) ...
```
The website will be available at
+ `http://localhost:8080`
or
+ `http://127.0.0.1:8080`
or (local ip address)
+ `http://192.168.0.102:8080`
or even
+ `http://<MACHINE-HOSTNAME>.local:8080`
or also
+ `http://<TAILSCALE-HOSTNAME>:8080`
### Deploy a static website to Github GH-Pages
It is also possible to generate a static website from a wiki repository for deployment with github by creating an orphan branch named as gh-pages and a worktree directory ./dist for this branch.
a) Optional create a backup of current project directory.
```sh
$ cd .. && cp -rv project-folder project-folder.back
$ cd project-folder
```
1) Save uncommited changes to the stash
```sh
$ git stash save
```
2) Create and switch to gh-pages orphan branch.
```sh
$ git checkout --orphan gh-pages
```
3) Remove all tracked files from current branch.
```sh
$ git rm -rf .
```
4) Create the first page and commit.
```sh
$ echo "first page" > index.html
$ git add index.html
$ git commit -m "First commit"
```
5) Upload this branch to remote.
```sh
$ git push origin gh-pages
```
6) Set the upstream of gh-pages as the origin (remote repository) in order to be able to upload this branch using `$ git push`.
```sh
$ git push --set-upstream origin gh-pages
```
7) Go back to the previous branch or master or main branch. Note that github and other git forges use the name "main" instead of "master".
```sh
$ git checkout master
## or
$ git checkout main
```
8) Pop the stash
```sh
$ git stash pop
```
9) Add worktree gh-pages as worktree directory dist in order to avoid branch switch to gh-pages branch.
```sh
$ git worktree add dist gh-pages
```
10) Now, it is possible to commit changes to the gh-pages branch without changing the branch using `$ git checkout <BRANCH-NAME>`. For instance,
```sh
# Entered gh-pages branch
$ cd ./dist
# Create page.html file
$ echo "<h1>Index page</h1>" > page.html
# Add index.html to staging area
$ git add page.html
# Upload change to origin/gh-pages
$ git push
```
Now, the page will be available at `https://<GITHUB-USERNAME>/<PROJECT-NAME>/page.html`
Then, use the following command to compile a wiki repository, in this case ./sample-wiki to html.
```sh
export GITHUB_REPOSITORY_NAME=dummy
export SITENAME=MBook
$ uv run mwiki export --wikipath=./sample-wiki \
--website-name=$SITENAME \
--main-font=cmu-concrete \
--title-font=chicago \
--code-font=libertinus-mono \
--allow-language-switch \
--root-url=/$GITHUB_REPOSITORY_NAME \
--output=./dist
```
Finally, deploying the static website requires commiting the changes in the ./dist directory and pushing it to remote.
```sh
$ cd dist
$ git add *
$ git commit -m "Updated gh-pages"
$ git push gh-pages master
````
After this step the static website will be available at
+ `https://<USERNAME>.github.io/<PROJECT_NAME>`
If the username is *johndoe* and the project/repository name is *dummy*, the static websiste's URL will be
+ `https://johndoe.github.io/dummy`
**Example**
The sample static website https://caiorss.github.io/mwiki was generated using the command
```sh
$ mwiki export --wikipath=./sample-wiki \
--website-name=MBook \
--main-font=cmu-concrete \
--title-font=chicago \
--code-font=libertinus-mono \
--allow-language-switch \
--latex-renderer=katex \
--root-url=/mwiki --source \
--output=./dist
```
which is automated using the makefile rule `$ make gh-pages`.
## Development
**STEP 1:** Clone the repository
```sh
$ git clone <REPOSITORY-URL> mwiki
$ cd mwiki
```
**STEP 2:** Install [Poetry](https://python-poetry.org/) package manager if it is not installed yet.
```sh
$ pip install poetry
```
**STEP 2:** Install dependencies with Poetry.
```sh
$ poetry install
```
**STEP 3:** Generate VScode JSON files .vscode/settings.json and .vscode/launch.json for integrating Poetry, Virtualenv and VSCode editor.
```
$ make vscode
```
or run
```sh
$ pythopn vscode.py
## OR
$ ./vscode.py # On Unix-like operating system (Linux, BSD or MacOSX)
```
**STEP 4:** Run MWiki in development mode.
```sh
$ poetry run mwiki server --debug \
--host=0.0.0.0 \
--port=8000 \
--wikipath=/path/to/wiki-markdon-files/directory/notes
[TRACE] Admin user created OK
[INFO] Enter the username: admin and password: '0JAJ6UAMUA' to log in.
* Serving Flask app 'mwiki.server'
* Debug mode: on
WARNING: This is a development server. Do not use it in a production deployment. Use a production WSGI server instead.
* Running on all addresses (0.0.0.0)
* Running on http://127.0.0.1:8000
* Running on http://192.168.0.103:8000
Press CTRL+C to quit
* Restarting with stat
[INFO] Enter the username: admin and password: '0JAJ6UAMUA' to log in.
* Debugger is active!
* Debugger PIN: 795-641-657
```
The notes folder, in this case '/path/to/wiki-markdon-files/directory/notes', is just a folder containing markdown files and images. This folder can also be a *Obisdian Vault*, a repository of markdown files and images.
```sh
$ ls notes/
'Android OS for Mobile Devices.md'
'APL - Programming Languages.md'
articles/
'Authoring Tools.md'
AWS_Cloud.md
aws.org
'Backend Design and Scalability.md'
'Backup and Digital Preservation.md'
Bookmarks.md
books/
'Books and Files.md'
'Business News.md'
'Caching Algorithms and Synchronization.md'
'Collected Info.md'
'Command Line.md'
'Compiler Design.md'
'Computer Architecture.md'
... ... ... ... ... ... ... ...
... ... ... ... ... ... ... ...
```
Every markdown file is rendered as wiki page. For instance the file 'Business News.md' corresponds to the wiki page
+ `http://<PAGE-DOMAIN>/wiki/Business%20News`
or
+ `http://localhost/wiki/Business%20News`
**STEP 5:**
Open MWiki in the web browser, in the port 8080 by copying and pasting the URL http://localhost:8000 and enter 'admin' in the username entry and the initial admin password in the password field. The initial admin password is provided in the previous command output. In this password is '0JAJ6UAMUA', which is a random generated string unique per MWiki installation.
**STEP 6:**
Open the settings page http://localhost:8000/admin and change the Wiki settings. Then go the URL http://localhost:8000/user and change the admin password. Note that user passwords are never stored in plaintext, they are always stored in hashed form for security reasons.
## Companion Software and Tools
The following set of companion sotfware or apps are recommended for MWiki as they can provide additional features and improve usage.
**Searche Engine**
+ https://noai.duckduckgo.com
+ Search engine without false and misleading AI summary.
**Online Tools**
+ *QuickLatex*
+ https://www.quicklatex.com
+ This online tool allows quickly viewing and rendering LaTeX math expressions without needing to install anything.
+ *Table Generator for Markdown, LaTeX and MediaWiki*
+ https://www.tablesgenerator.com
+ *Detexify*
+ https://detexify.kirelabs.org/classify.html
+ *Allows to recognize LaTeX symbols by drawing them by hand.*
+ *LaTeX Equation Editor*
+ https://editor.codecogs.com/
+ *Mathcha.io*
+ https://www.mathcha.io
+ *Online tool for scientific/technical illustration drawing, which supports LaTeX symbols and has many building blocks for drawing geometric, electrical, mechanical and computer science diagrams or schemas.
+ *Plurimath - Convert between multiple math representation languages*
+ https://www.plurimath.org/
+ *How to write algorithm in Latex*
+ https://shantoroy.com/latex/how-to-write-algorithm-in-latex
+ *LaTeX/Algorithms - Wikibooks*
+ https://en.wikibooks.org/wiki/LaTeX/Algorithms
**Browser Addons**
+ *LibreWolf* - Fork of Firefox Web Browser
+ https://librewolf.net/
+ *Modified Firefox web browser hardened for better security, privacy and protection against tracking.*
+ *Obsidian Web Clipper* (Firefox Addon)* \[BEST\]
+ https://addons.mozilla.org/en-US/firefox/addon/web-clipper-obsidian
+ Extension that lets users to save web pages in markdown format or turn selected parts of the web page into markdown. This tool can be used with MWiki for extracting information from web pages as MWiki markup language is compatible with Obsidian markdown.
+ *Web Archives* - Search for older versions of current URL win Web Archiver, archive.is and other sites.
+ https://addons.mozilla.org/en-US/firefox/addon/view-page-archive/
+ *View archived and cached versions of web pages on various search engines, such as the Wayback Machine and Archive․is.*
+ *Allow Right Click - Re-enable right-click on websites that overwrite it* (Firefox)
+ https://addons.mozilla.org/en-US/firefox/addon/re-enable-right-click/
+ *The "Allow Right-Click" extension modifies some JavaScript methods to enable the original right-click context menu when a web page intentionally blocks right-clicking on its content. Most modern browsers permit JavaScript to disable the default context menu when a web page provides its custom context menu for its content (such as in Google Docs). However, this ability can also allow website owners to disable the right-click context menu without providing any useful functionality. The extension adds a button to the toolbar area of the user's browser. Clicking the extension's icon injects a small script into the current page to remove the context menu blockage. It is important to note that the extension does not inject any code by default on any web page; it only does so on user action. Users can click the extension button to release the restriction when a website blocks the right-click context menu without offering a custom context menu.*
+ *Script Blocker Ultimate* - (NoScript, Disable JS)
+ https://addons.mozilla.org/en-US/firefox/addon/script-blocker-ultimate/
+ *Extension for toggling execution of Javascript, which allows disabling and enabling JavaScript.*
+ *NoScript*
+ https://noscript.net/
+ *Browser extension that blocks scripts by default.*
+ *Tree Style Tabs for Firefox*
+ https://addons.mozilla.org/en-US/firefox/addon/tree-style-tab
**Password Manager**
+ *Official KeepassXC Websiste* (Non Cloud, Offline and FOSS password manager)
+ https://keepassxc.org
+ *Let KeePassXC safely store your passwords and auto-fill them into your favorite apps, so you can forget all about them. We do the heavy lifting in a no-nonsense, ad-free, tracker-free, and cloud-free manner. Free and open source.*
+ *KeePassXC-Browser*, Firefox Add-Ons (Browser integration for KepassXC)
+ https://addons.mozilla.org/en-US/firefox/addon/keepassxc-browser/
+ *KeePassDX* (Fdroid App store)
+ https://f-droid.org/packages/com.kunzisoft.keepass.libre/
+ Even though KeepassXC supports neither Android nor iOS mobile devices, KeePassXC database file can copied to mobile device using some file synchronization app and opened using any of many suitable mobile app for this file format. One of such mobile application for Android devices is KeePassDX, which is a free, open source and local first (offline, non cloud) just as KeePassXC. This application has the same features as KeePassXC, for instance, password generator, auto fill service, TOTP code generation and TOTP secret importing through QR code.
+ *Documentation and FAQ*, KeePassXC
+ https://keepassxc.org/docs/
+ *KeePassXC: Getting Started Guide, KeePassXC*
+ https://keepassxc.org/docs/KeePassXC_GettingStarted
+ *KeePassXC/cli*, Gentoo Wiki
+ https://wiki.gentoo.org/wiki/KeePassXC/cli
+ *Saving Attachments in KeePass*, Steve Shank, Oregon Computer Solutions
+ https://steveshank.com/cgi-bin/article.pl?aid=815
**Translation and Text-to-speak**
+ *Speech Note - Flathub* \[Linux Flatpak APP\] (Offline "G00gl3 Translator")
+ https://flathub.org/apps/net.mkiol.SpeechNote
+ Brief: *Speech Note let you take, read and translate notes in multiple languages. It uses Speech to Text, Text to Speech and Machine Translation to do so. Text and voice processing take place entirely offline, locally on your computer, without using a network connection. Your privacy is always respected. No data is sent to the Internet.*
+ WARNING: Automated text translation tools are based on word probability in the same way as the hyped LLM - Large Laguage Models. As a result, they may not be able to accurately translate slangs, jargons, popular sayings and language nuances. Moreover, they are more likely to fail for languages distant from European languages and English. It is also worth noting that some language varieties or dialects, such as the Bavarian German dialect, might exist mostly in spoken form and unfortunately, not exist in significant amount in written form, what makes it harder to automated tools to translate the information.
**Screenshot Tools**
Note: These tools allows taking screenshots of select part of the screen and pasting the screenshot image at the target application or MWiki editor by typing Ctrl + v.
- *Spetacle* \[BEST\]
+ https://apps.kde.org/spectacle/
+ *KDE Plasma tool for taking screenshots. It also allows selecting rectangular are of the screen and adding texts and annotations. This app is available in any Linux distribution with KDE plasma desktop environment.*
- *Flameshot*
+ https://flameshot.org
+ *Cross platform screenshot tool available for Microsoft Windows, Linux distributions and Apple's MacOSX.*
- *Flameshot - Flatpak*
+ https://flathub.org/apps/org.flameshot.Flameshot
- *KSnip - Flathub* (KDE/QT Flatpak App)
+ https://flathub.org/apps/org.ksnip.ksnip
+ *Ksnip is a Qt based cross-platform screenshot tool that provides many annotation features for your screenshots.*
- *Shutter Screenshot tool* \[BEST\]
+ https://shutter-project.org
+ => Note: Note available as AppImage or flatpak app. It is easier to install Shutter in Debian-based or Ubuntu-based Linux distributions.
**Video Recorder**
+ *Peek - Flathub* (Screen Recorder - can create GIF animation or WebM and MP4 videos)
+ https://flathub.org/apps/com.uploadedlobster.peek
+ Brief: * Peek makes it easy to create short screencasts of a screen area. It was built for the specific use case of recording screen areas, e.g. for easily showing UI features of your own apps or for showing a bug in bug reports. With Peek you simply place the Peek window over the area you want to record and press "Record". Peek is optimized for generating animated GIFs, but you can also directly record to WebM or MP4 if you prefer.*
**Container Orchestration Tools**
+ *Docker Compose*, Docker Company Official Docs
+ https://docs.docker.com/compose/
+ *Podman Compose*, Red Hat
+ https://docs.podman.io/en/latest/markdown/podman-compose.1.html
**Site-To-Site Mesh VPN (Virtual Private Network)**
A site-to-site mesh VPN such as **tailscale** can be helpful for self hosting this application in a private local network and accessing it from anywhere around the world without exposing any TCP or UDP ports to the internet.
+ *Tailscale* - Official Website
+ https://tailscale.com
+ Note: Only some tailscale clients are open source, the default tailscale server provided as SAAS (Software-As-Service) is not open source, although there exists the **Headscale** open source implementation of tailscale server.
+ *Tailscale Client Download*
+ https://tailscale.com/download
+ *Tailscale Client for Android on F-Droid App Store* (App Store for Open Source Android apps compiled with reproducible build)
+ https://f-droid.org/packages/com.tailscale.ipn
+ *Headscale Server* (Open source, suitable for homelabs and self-hosting)
+ https://headscale.net/stable
+ *Headscale Server - Github Repository* (Written in GO - Golang)
+ https://github.com/juanfont/headscale
+ *Cookie AutoDelete* (For better privacy and less tracking)
+ https://addons.mozilla.org/en-US/firefox/addon/cookie-autodelete/
+ *Control your cookies! This WebExtension is inspired by Self Destructing Cookies. When a tab closes, any cookies not being used are automatically deleted. Keep the ones you trust (forever/until restart) while deleting the rest. Containers Supported.*
## Further Reading
+ *If it is worth keeping, save it in Markdown*
+ https://p.migdal.pl/blog/2025/02/markdown-saves
+ *Why I prefer human-readable file formats*
+ https://adele.pollux.casa/gemlog/2025-08-04_why_I_prefer_human-readble_file_formats.gmi
+ *How I use Tailscale*, Chris Smith (2025)
+ https://chameth.com/how-i-use-tailscale/
+ *Exposing a web service with Cloudflare Tunnel*, Erissa A (2022)
+ https://erisa.dev/exposing-a-web-service-with-cloudflare-tunnel/
+ *What if you could host a web service with no ports exposed? With Cloudflare Tunnel, you can!*
+ COMMENT: For people who does not trust Cloudflare, a self-hosted Tailscale mesh VPN is a better choice. Tailscale allows establishing a direct end-to-end encrypted tunnel between tailscale client nodes (machines with tailscale client installed). As a result, any node in a taiscale network can access any web service exposed by other tailscale nodes. For instance, if an Android or Iphone has a taiscale client app installed. It is possible to browse a websiste hostead in the local network, possibly behding a NAT - Network Address Translator which blocks incoming connections by default, by opeing the URL http://dummy:8080 or http://dummy.net.ts:8080, where dummy is the hostname or tailscale name of the computer that hosts the web server. Tailscale is not only useful for accessing local web servers from anywhere without exposing any TCP or UDP port to the internet, it is also helpful for accessing windows shared forlders (SAMBA/SMB), sometimes called Windows shares, and Windows Machines remotely through VNC or remote desktop.
+ COMMENT: Exposing a local web server to the internet with Taiscale requires installing a tailscale client in the local computer hosting the web server and a tailscale client in the VPS - Virtual Private Server, a virtual machine, hosted on the cloud with public IP address. All it is need is to add a configuration to Caddy or Nginx in the remote machine to forward the network traffic of ports 80 (http) and 443 (https) to the tailscale IP addres or hostname of the local computer, for instance dummy.net.ts is the hostanme or tailscale name of the local computer is dummy. The role of a tailscale server, that must be installed in machine with static and public IP address, is only coordinating connections between clients. Once a connection from client-to-client has been established, the network traffic between clients does not goes thorugh the server.
+ *Scientific Articles*, MyST
+ https://mystmd.org/guide/quickstart-myst-documents
+ *R Markdown*
+ https://rmarkdown.rstudio.com/
+ *R Markdown documents are fully reproducible. Use a productive notebook interface to weave together narrative text and code to produce elegantly formatted output. Use multiple languages including R, Python, and SQL.*
+ *MyST syntax cheat sheet*, Jupyter Book
+ https://jupyterbook.org/en/stable/reference/cheatsheet.html
+ NOTE: MWiki syntax is mostly compatible with MyST syntax because it uses the same markdown parser developed by Jupyter Book project. Credits should be given to MyST markdown project.
+ *Working with MyST Markdown*, MyST
+ https://mystmd.org/guide/quickstart-myst-markdown
+ *Export Static Documents*, MyST
+ https://mystmd.org/guide/quickstart-static-exports
+ *Try MyST*, MyST
+ https://mystmd.org/sandbox
+ *CommonMark*, MyST
+ https://mystmd.org/guide/commonmark
+ *CommonMark Spec*, CommonMark
+ https://spec.commonmark.org/0.31.2/#introduction
+ *reStructuredText* (Python RST syntax)
+ https://docutils.sourceforge.io/rst.html
+ *Documentation Audiences*, OpenEdx
+ <https://docs.openedx.org/en/latest/documentors/concepts/about_doc_audiences.html>
+ *Rendering Math in HTML: MathML, MathML Core, and AsciiMath*, Andrew Lock (2024)
+ https://andrewlock.net/rendering-math-in-html-mathml-mathml-core-and-asciimath/
+ *Latex, MATHML, and tex4ht: Tools for Creating Accessible Documents (a brief tutorial)*, Jacek Polewczak
+ https://www.csun.edu/~hcmth008/mathml/acc_tutorial.html
+ *MathML in Web Browsers - A joint effort to add native MathML-Core support to web browsers*, Igalia
+ https://mathml.igalia.com/
+ *MathJax - render math on the Web on all browsers*, Murray Bourne (2011), Interactive Mathematics
+ https://www.intmath.com/blog/mathematics/mathjax-render-math-on-the-web-on-all-browsers-5703
+ *Exploring cross-browser math equations using MathML or LaTeX with MathJax*, Scott Hanselman (2014)
+ https://www.hanselman.com/blog/exploring-crossbrowser-math-equations-using-mathml-or-latex-with-mathjax
How to Install
- Download the CSS file below
- Move it to your vault's
.obsidian/snippets/folder - Open Obsidian → Settings → Appearance → CSS Snippets → Enable it
Stats
Stars
3
Forks
0
License
AGPL-3.0
Last updated 1mo ago
Categories
Tags
cmsmarkdownmathmystobsidianscientifictechnicalwiki