CSSAny theme
This version is old!
[Check out the plugin version if you don't wanna clutter your notes with HTML!](https://github.com/Avyrra/Obsidian-Infoboxes/tree/main)
# Install Guide
1. Download infobox-callouts.css
2. Open your vault's snippets folder (vault/.obsidian/snippets) - Can also be found by clicking the folder icon in the appearance options menu
3. Drag infobox-callouts.css into snippets folder
4. Refresh CSS snippets in Appearance Options Menu in Obsidian
5. Enable infobox-callouts
# Stylize your Infoboxes
1. Go to Community plugins menu and turn on Community Plugins
2. Click Browse
3. Search for Style Settings
4. Click on Style Settings. Install it. Then Enable it.
5. A new menu will appear at the bottom of your options menu called Style Settings
6. Enjoy!

# User Guide
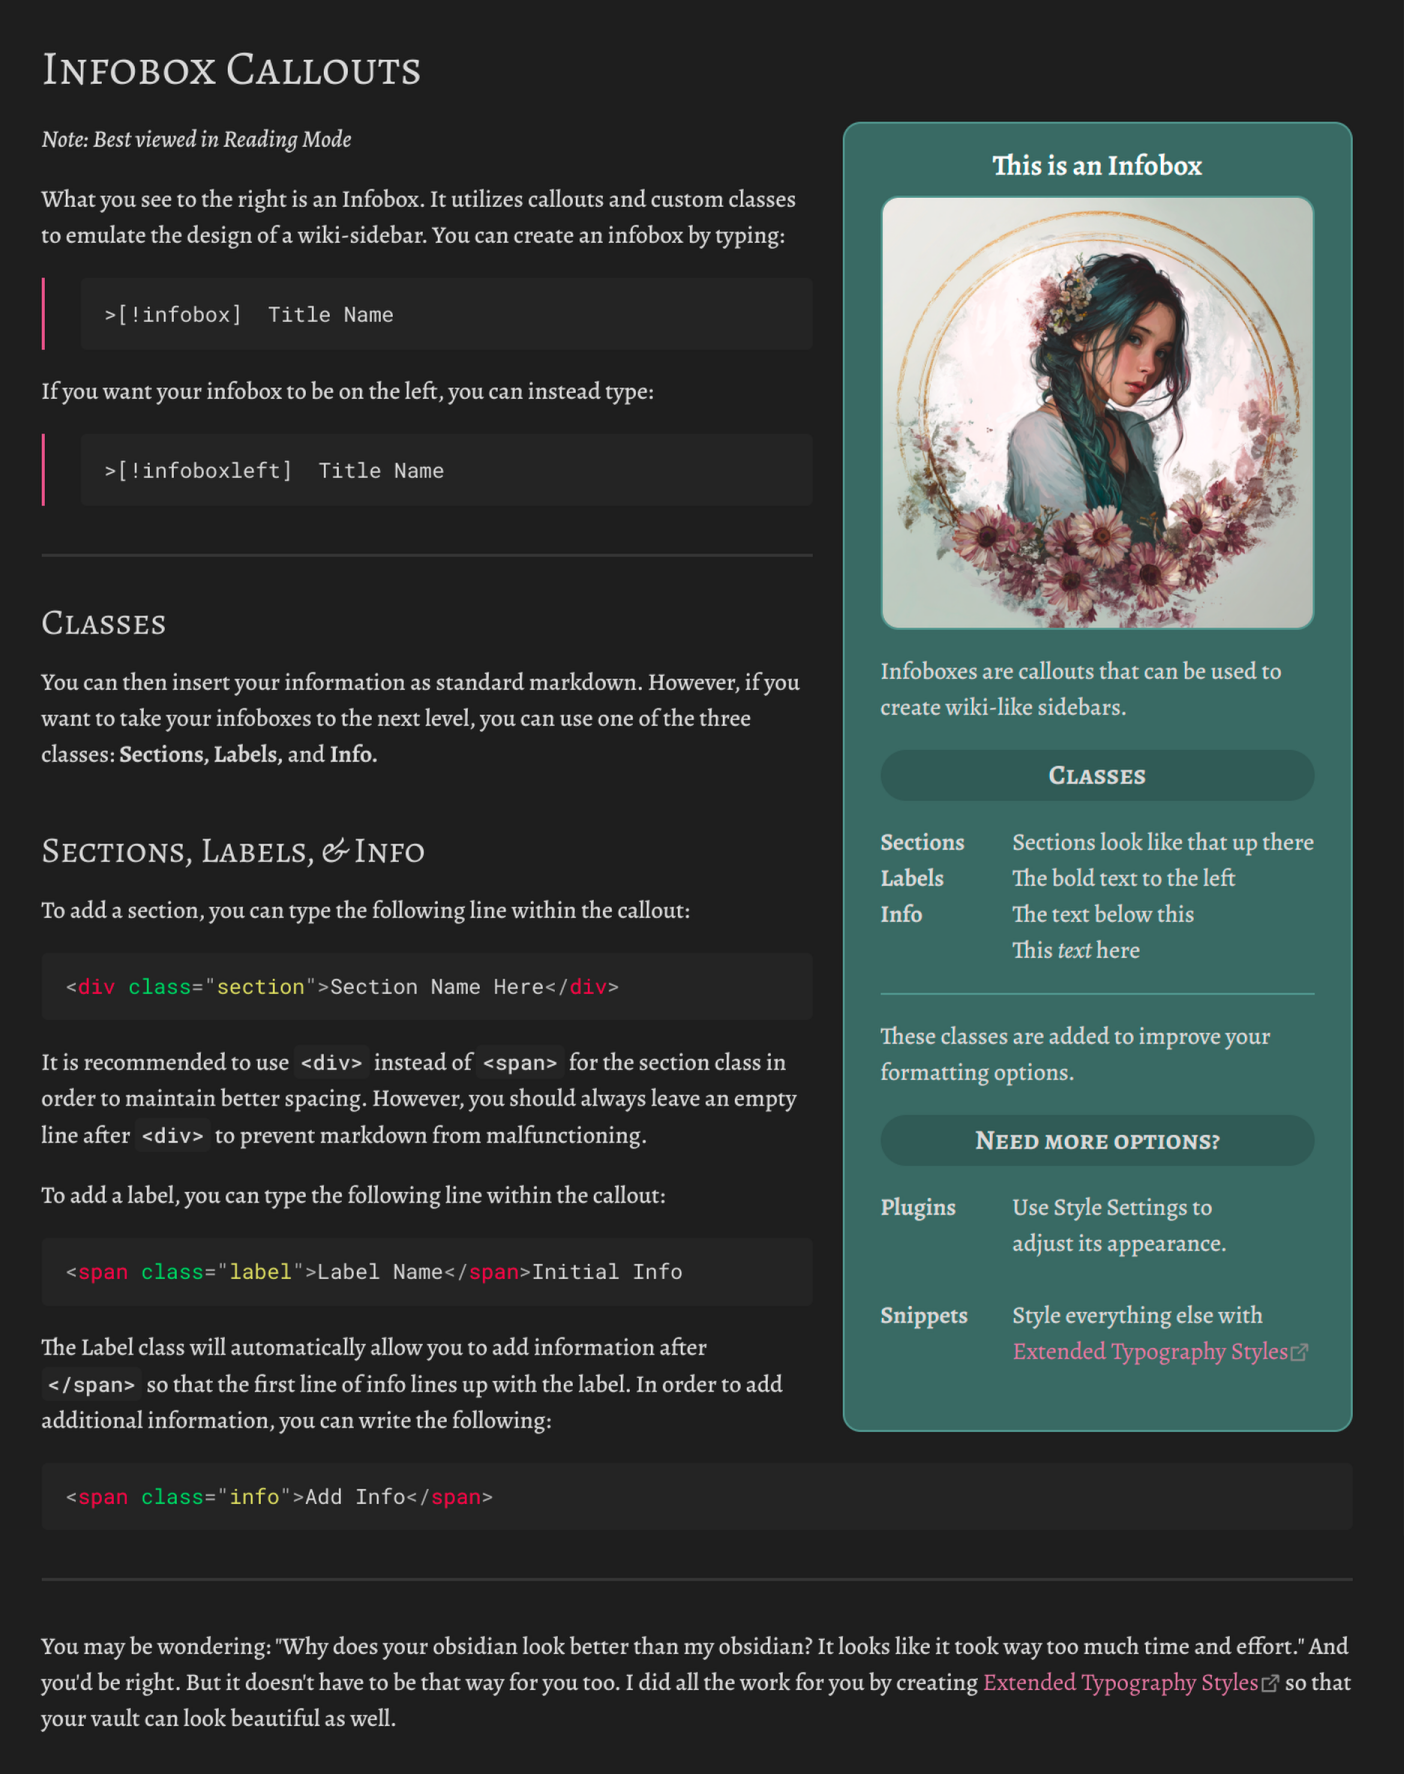
You can insert a callout by typing `>[!type]`.
Within the brackets, replace `type` with the kind of callout you want to use, and Obsidian will render it accordingly.
To make an infobox, use one of the following:
- `>[!infobox]` – defaults to right side
- `>[!infoboxright]` – right side
- `>[!infoboxleft]` – left side
After inserting a callout, each new line inside it should begin with `>` to indicate it's part of the same block.
Markdown is fully supported inside callouts. But if you want more structured formatting, a few custom HTML classes are available.
## Classes
Each class must be initiated with HTML. There are three types:
**Section**, **Label**, and **Info**.
QUICK REFERENCE
`<div class="section">` or `<div class="s">`
`<span class="label">` or `<span class="l">`
`<span class="info">` or `<span class="i">`
You can modify the look of each via **Style Settings** in Obsidian.
## Sections
Sections are used to break up content with a bolder header.
You can start the section class by typing the following: `<div class="section">` or `<div class="s">`
You can type the title of your section afterwards. To end the section class, type `</div>` after your section title. **Once a section class is ended, add an additional line afterwards or Obsidian won't read any markdown after it.**
## Label
Use the label class to anchor a line of text along the left edge of the infobox.
Add a label with `<span class="label">` or `<span class="l">` and type the name of the label immediately afterwards.
After typing the label name, type `</span>` to close it. All text typed on the same line after `</span>` will act as if it were part of the Info Class.
## Info
The info class will anchor text to a margin positioned after a label. This margin can be set within Style Settings. The Info class is usually used for any information that exceeds the bounds of the Label Class.
Add info with `<span class="info">` or `<span class="i">` and type all information afterwards. Text will automatically wrap within this class onto the next line. Afterwards, type `</span>` to close it.
# Tips
1. It is recommended to use Source View in Obsidian when typing an info box. When typing in Live Preview, the automatic rendering may interfere with input. You can open the same document using split view to see it update in real time.
2. On desktop, use shift+enter when typing in the callout to automatically add `>`
3. You can download my example vault in order to see exactly how I used it in my example. (Note, you will need the fonts Alegreya and Alegreya SC if you want it to look the same.)
4. Or you can use the image below. It is the source view of my example from above.

# FAQ
## Will it work in Live Preview?
Not pefectly. Obsidian uses a different rendering method for Live Preview and Reading Mode. Currently, Live Preview will render the infobox correctly, but will not wrap the text. I am looking into whether or not it's possible to change this via a snippet, but I'm not sure yet.
## Can I use this in my-
Yes. Read the MIT License for more information.
## Why use HTML classes? They're a pain in the ass.
I agree. I tried doing it via full markdown before, but that was an even bigger pain in the ass. Ultimately, I decided that using HTML was the least amount of hassle for both myself and the user.
How to Install
- Download the CSS file below
- Move it to your vault's
.obsidian/snippets/folder - Open Obsidian → Settings → Appearance → CSS Snippets → Enable it
Stats
Stars
30
Forks
0
License
MIT
Last updated 1mo ago